Deploying GoPhish on AWS
In this article, I’ll show you how to deploy the GoPhish framework on Amazon Web Services (AWS).
The article is for informational purposes and is intended for security professionals conducting testing within their organization or contract. The author is not responsible for any harm caused by using the information provided. The use of phishing emails and web resources, theft of credentials and violation of the secrecy of correspondence are punishable by law.
Deploying EC2 Instance
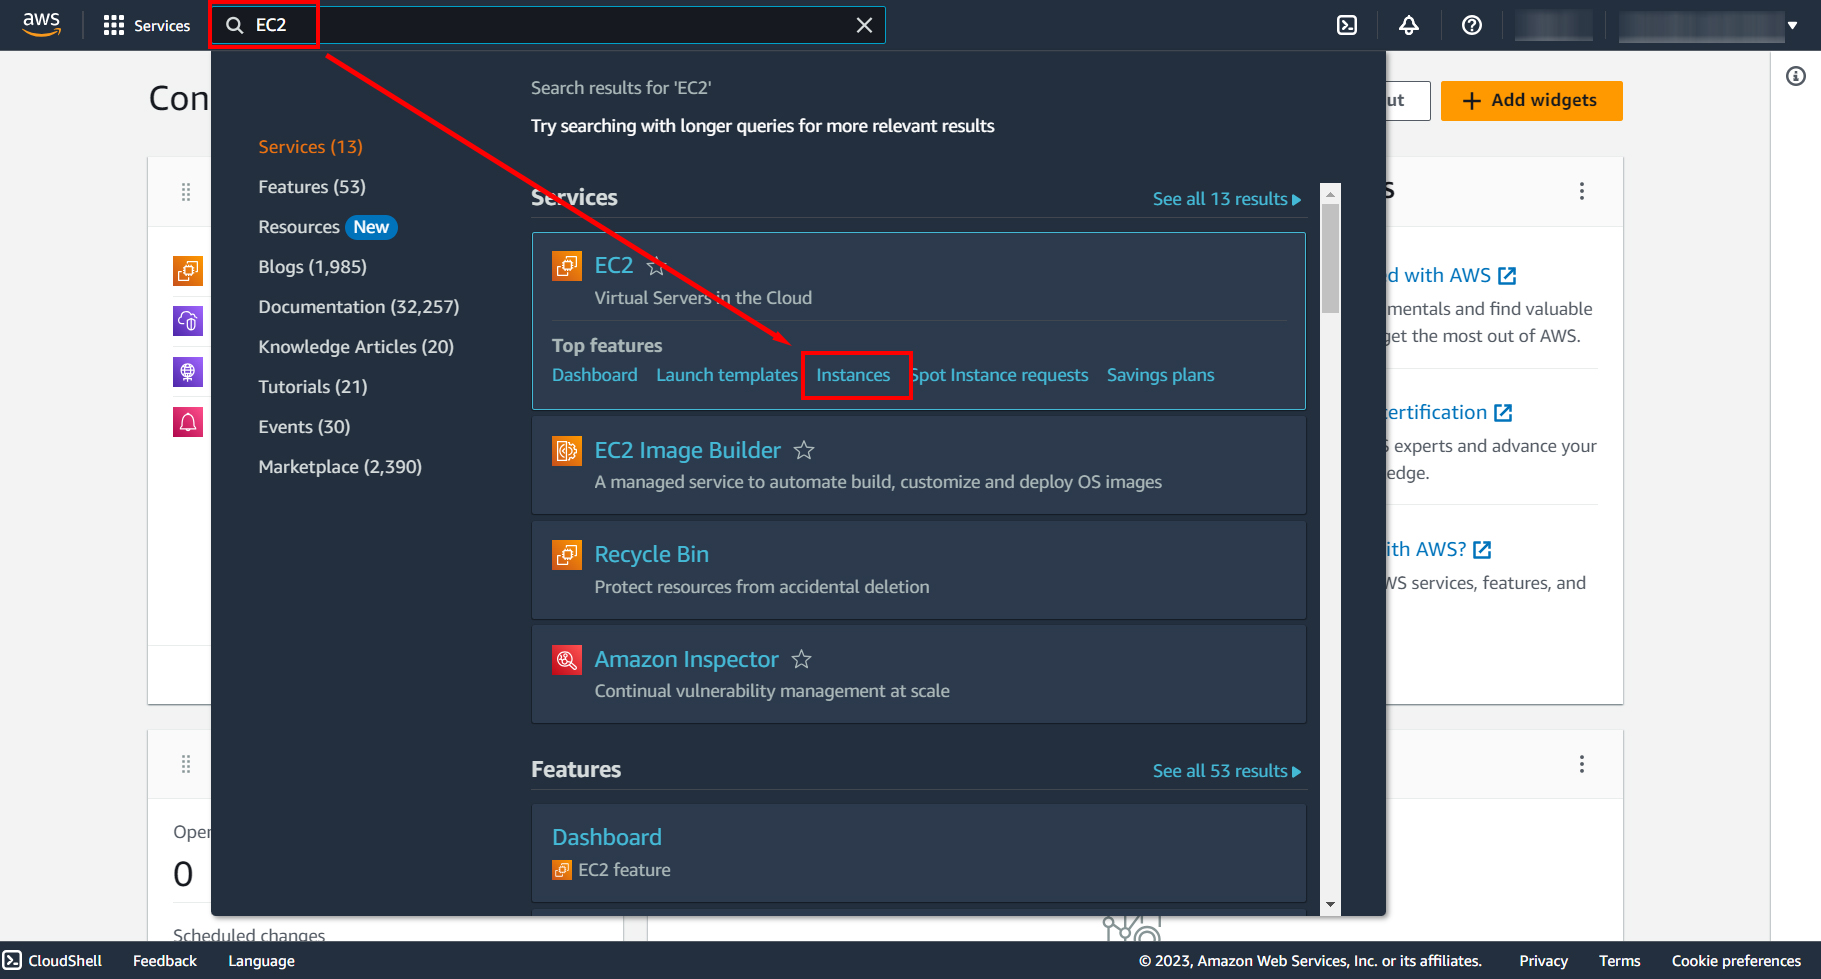
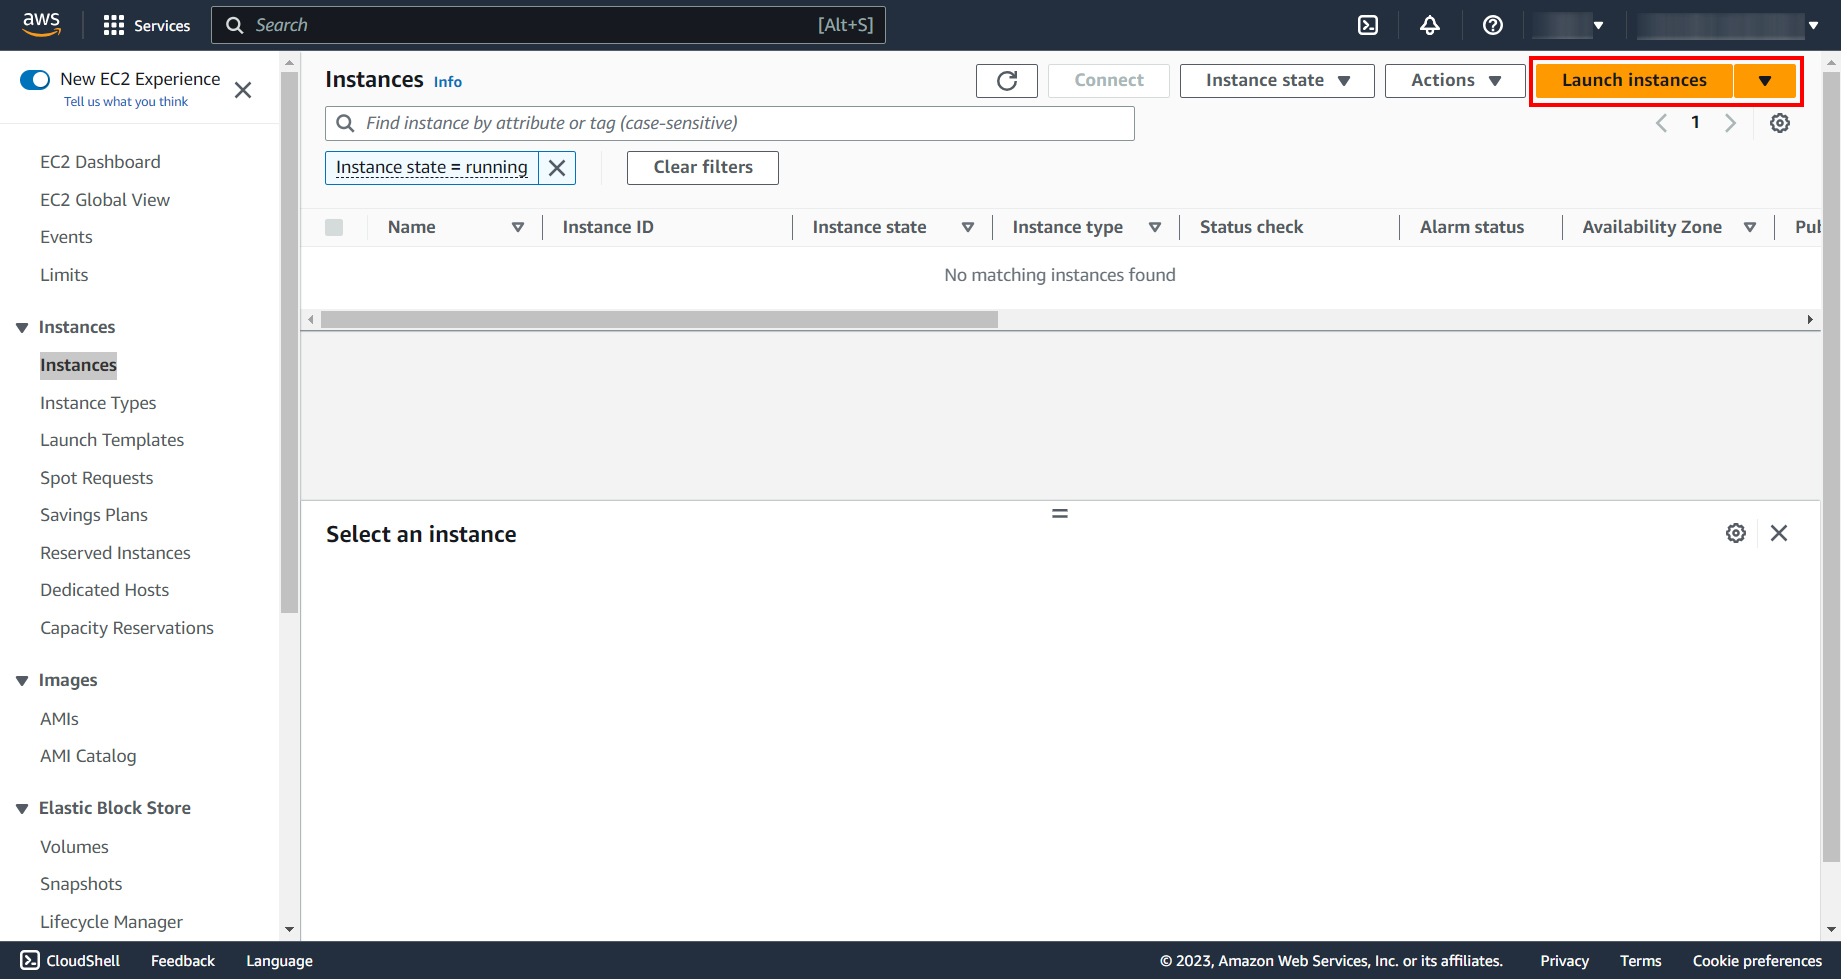
The first thing you need to do is log into the ready-made AWS account. It can be a paid or free account. Go to the EC2 – Instances, click “Launch Instance” to start deploying an instance.
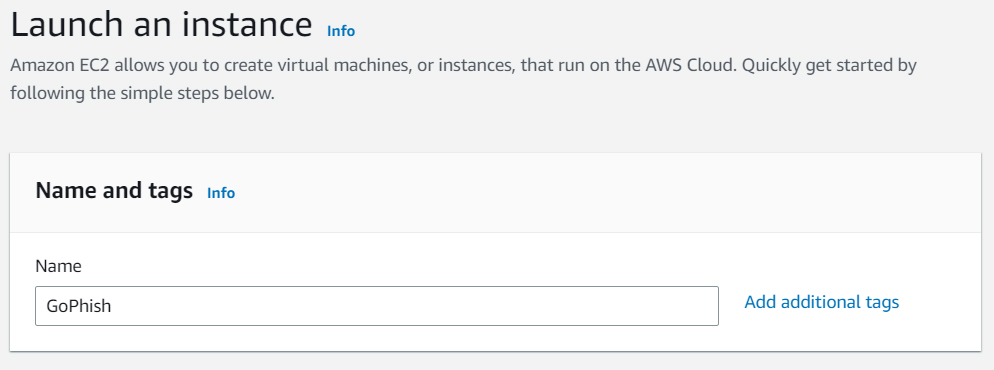
Name your instance like GoPhish.
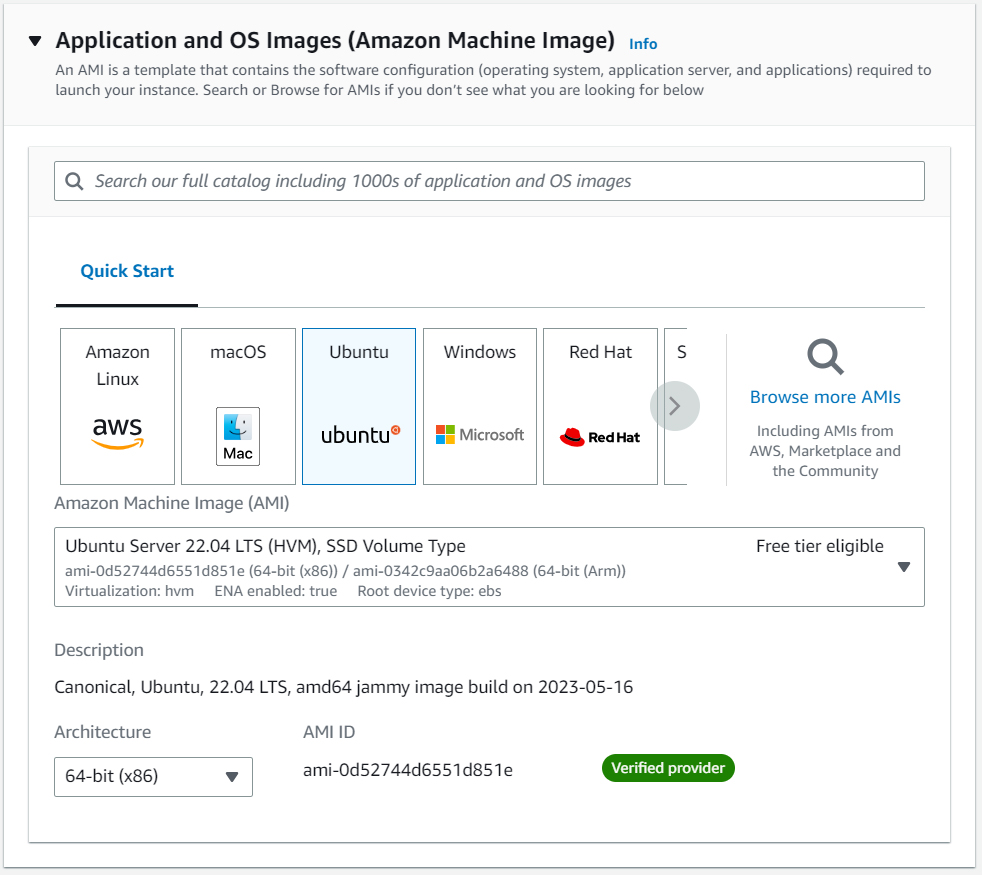
Then select the operating system of your instance. I will be using Ubuntu Server 20.04.
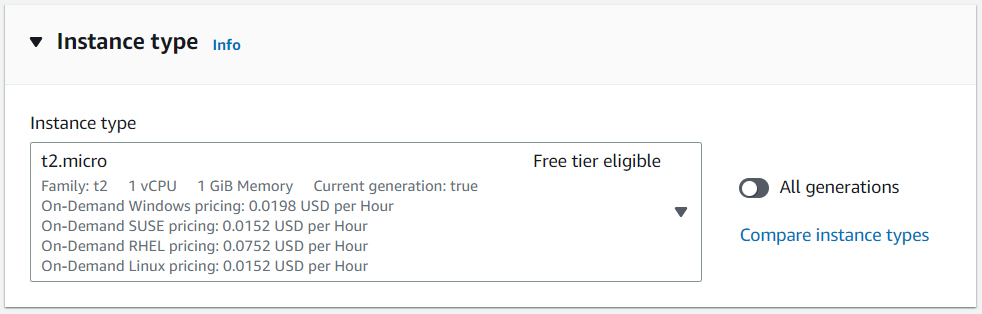
The next step is to choose an instance type. Since I’m using a free account, I’ll leave t2-micro.
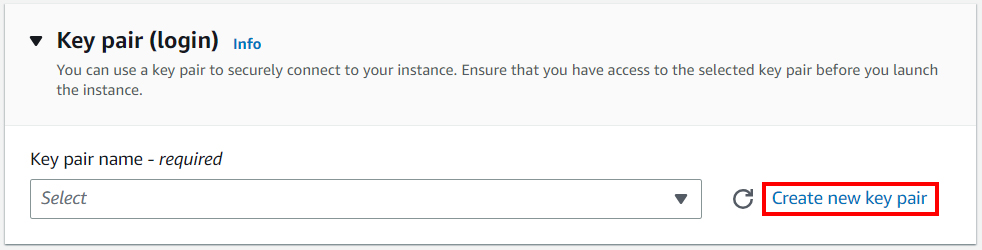
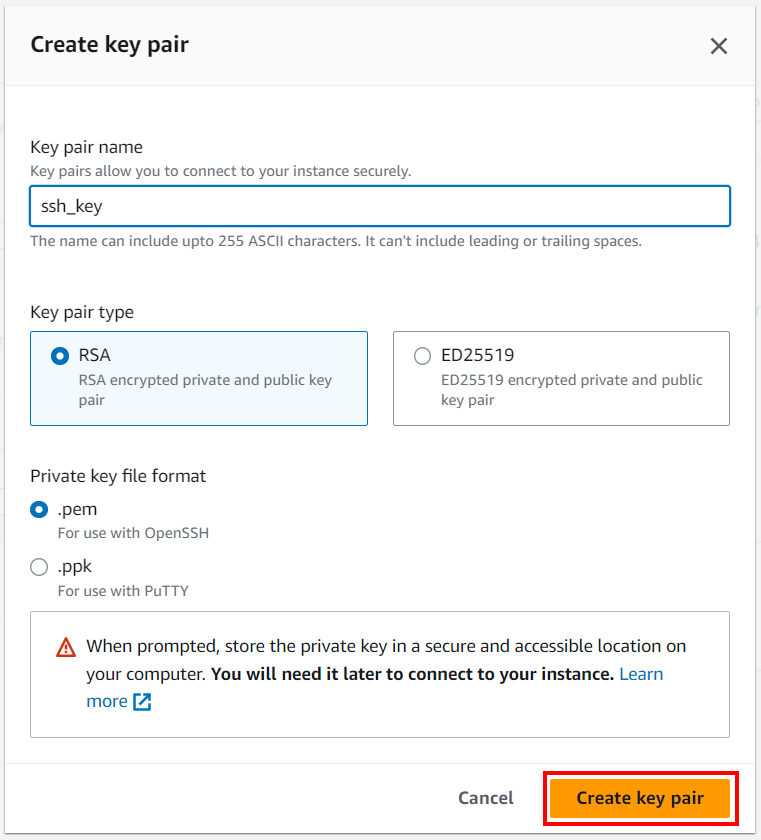
To connect to a new instance via SSH, you will need a key pair. If you have previously created a key pair, select it from the list. To create a new key pair, click Create new key pair.
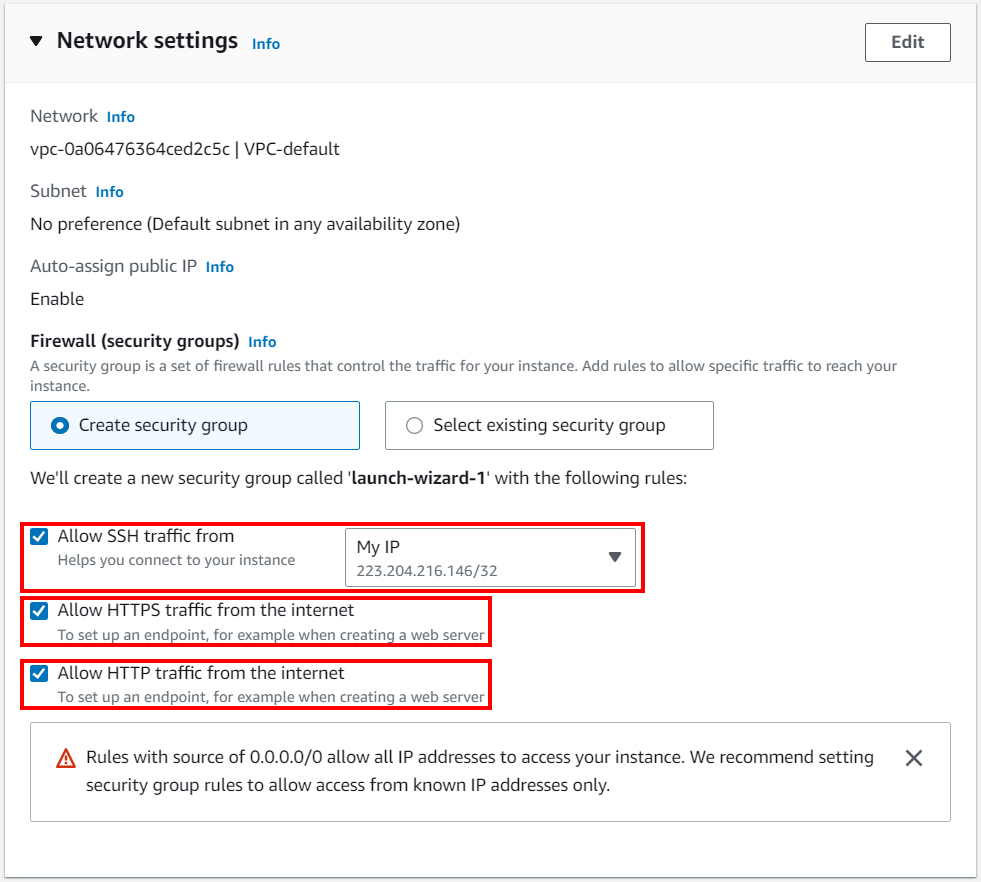
Then go to network settings. You need to allow SSH traffic only from your IP and allow HTTP and HTTPS traffic from the Internet.
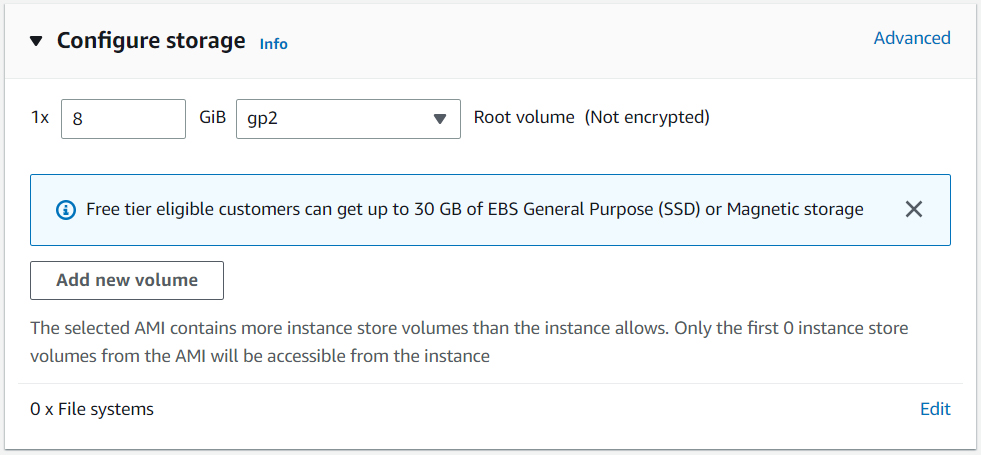
In the final step, specify the storage size. 8-10 GB will be enough.
Click “Launch instance”. The instance has been created.
Deploying GoPhish on instance
You are now ready to deploy the GoPhish framework.
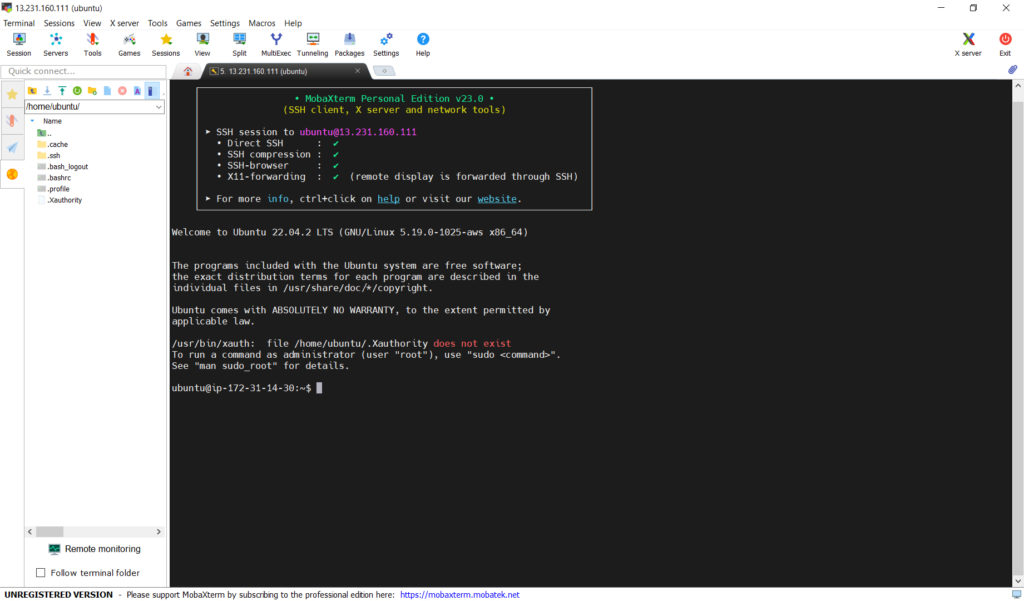
To further work with the instance, you will need an SSH client, such as PuTTY, KiTTY, Xshell, or any other. I am using MobaXterm.
Start the SSH client and create a new connection.
Copy the IP address of the remote host from AWS. For Ubuntu OS, use the specific username “ubuntu”. In the Advanced SSH settings tab, enable the Use private key checkbox and select the key you created earlier in AWS.

Connect to your instance.
(Do not forget at parts here using ‘sudo’ will be key.)
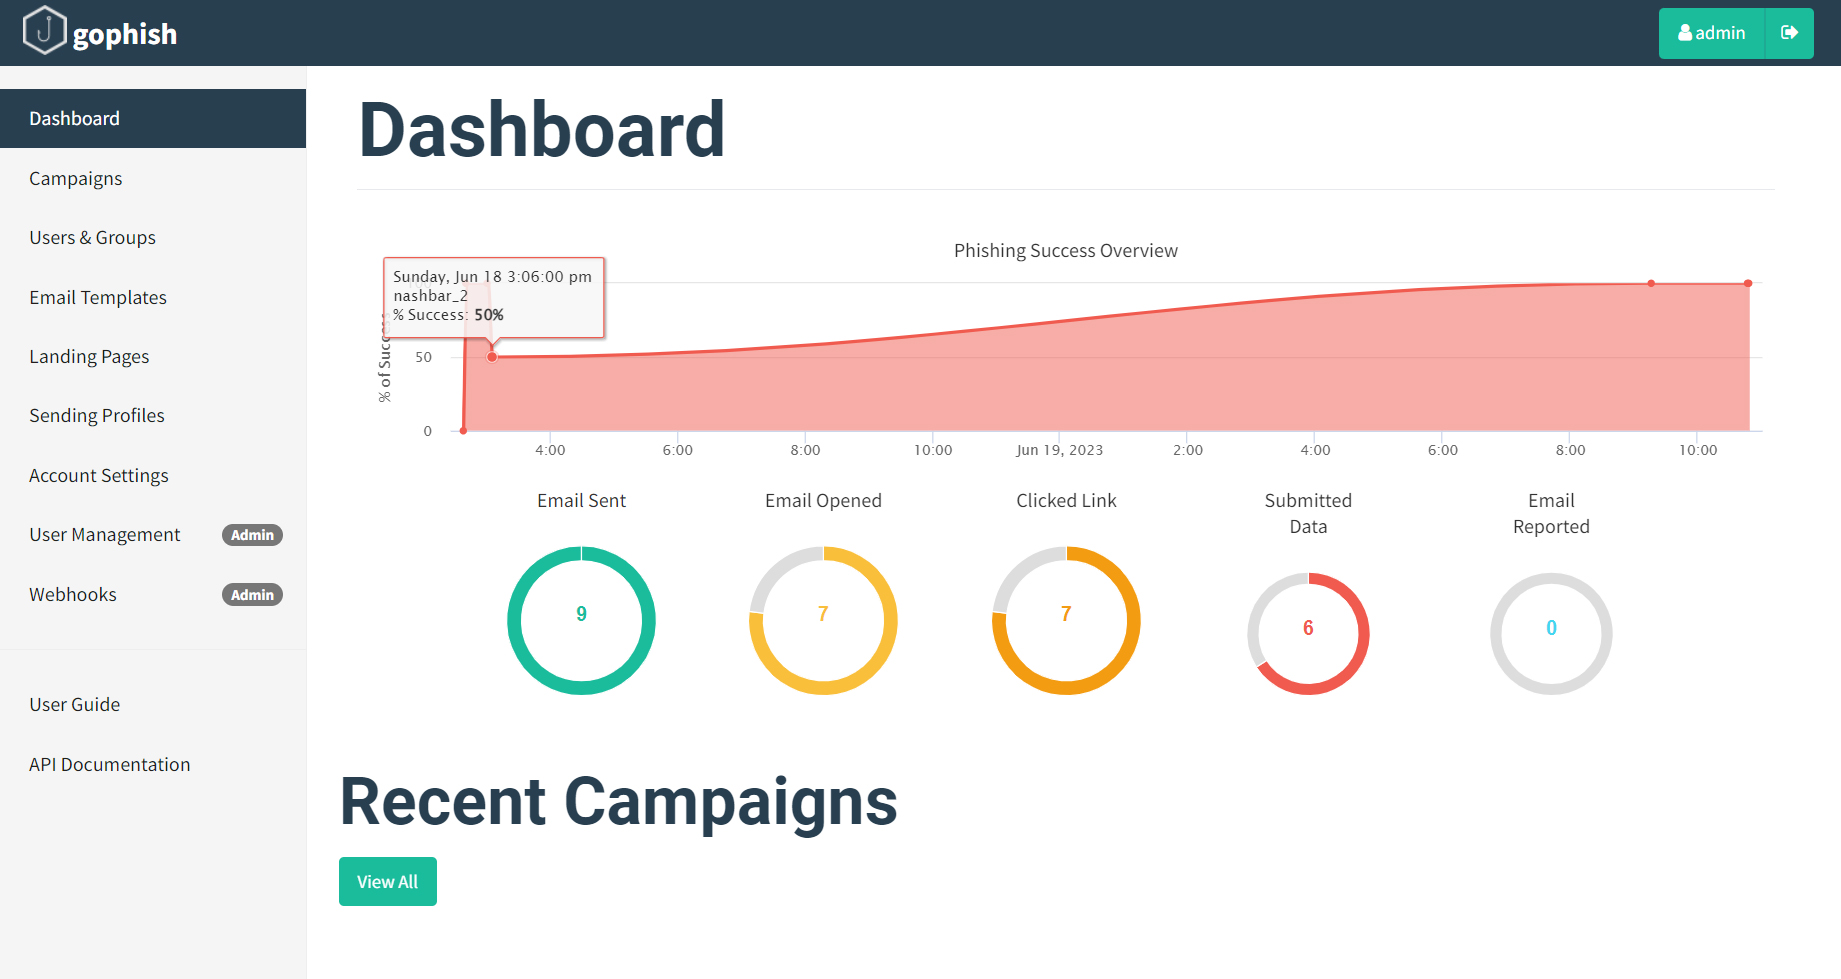
GoPhish is a great platform, very easy to use and set up. After running a campaign, GoPhish shows you good analytics and results.
(GoPhish URL: https://getgophish.com/).
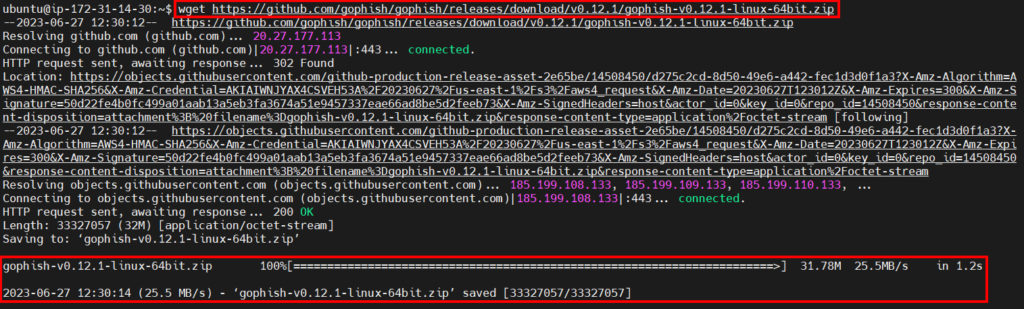
The first step is to get the latest GoPhish version, you do this by typing this into your SSH session:
wget https://github.com/gophish/gophish/releases/download/v0.12.1/gophish-v0.12.1-linux-64bit.zipand hit Enter:
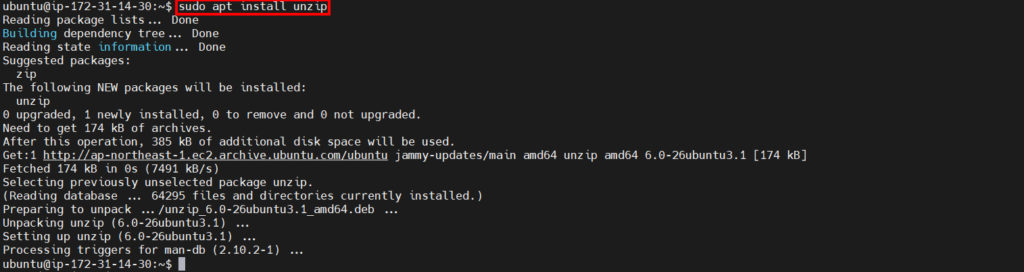
The next step is to install the unpacker so we can unpack our newly downloaded gophish-v0.12.1-linux-64bit.zip file.
Enter the command:
sudo apt install unzipHit Enter.
Then type:
unzip gophish-v0.12.1-linux-64bit.zip -d gophishHit Enter.
The gophish-v0.12.1-linux-64bit.zip file is unpacked into the ‘gophish’ directory.
Change to this directory by typing:
cd ./gophishView the contents of a directory with
ls -la
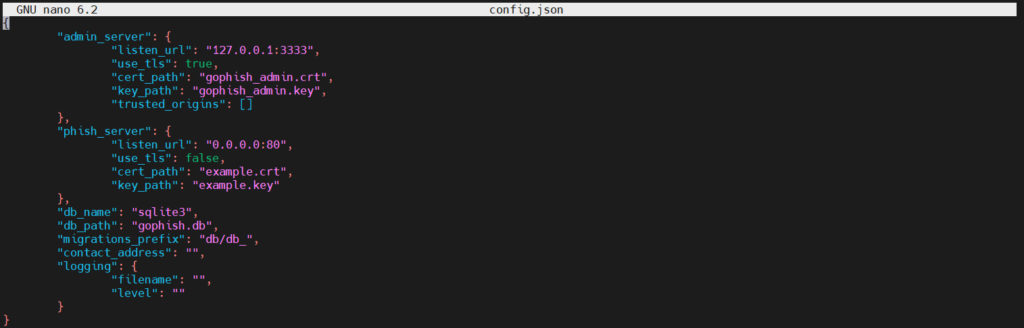
To get to the GoPhish admin interface, you need to make some changes to the config.json file. Start by typing:
sudo nano config.jsonYou should then see a screen like below:
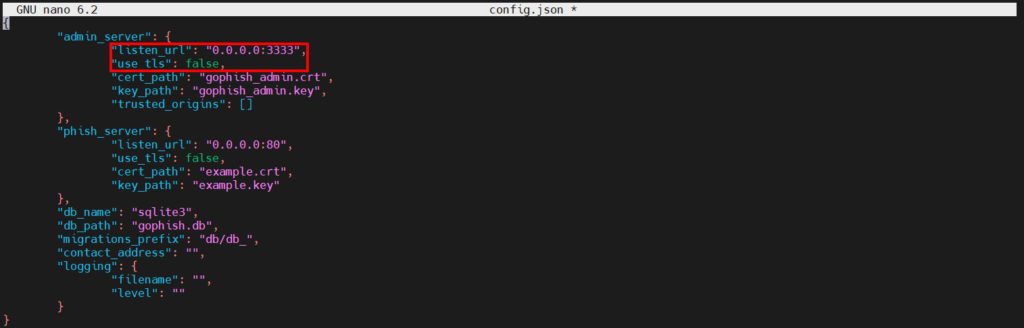
“listen_url” in the admin_server area, you need to change it to 0.0.0.0:3333.
I will talk about using tls to connect in another article, so “use_tls” needs to be changed to ‘false’.
After that, press CTRL + O, press Enter to save.
Then CTRL+X to exit.
It should look like the screenshot below:
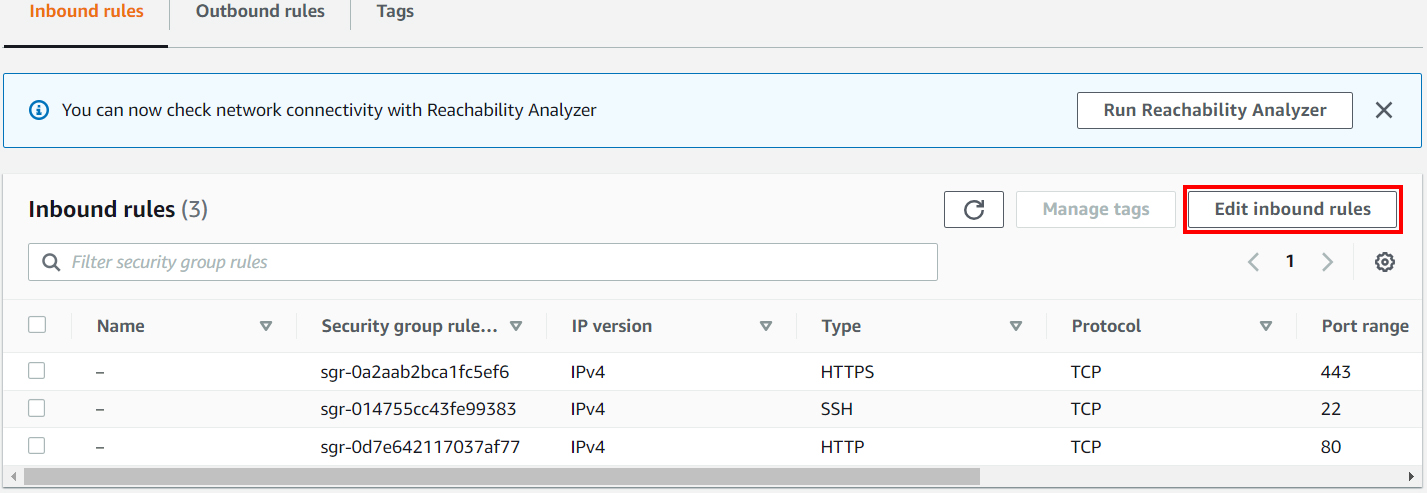
Next in EC2 you need to open port 3333 on your instance. Go to the Security tab and click on your Security groups.
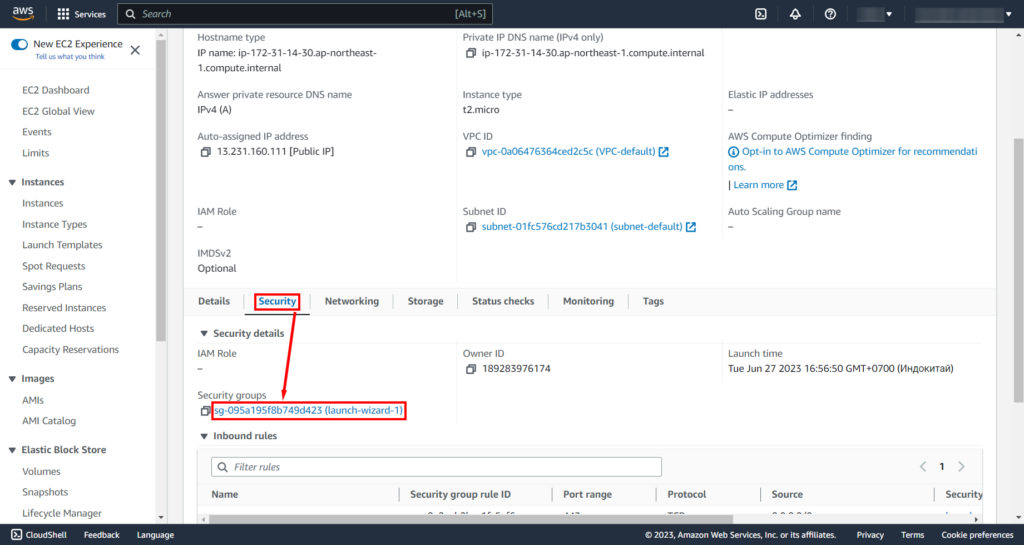
Go to Edit inbound rules.
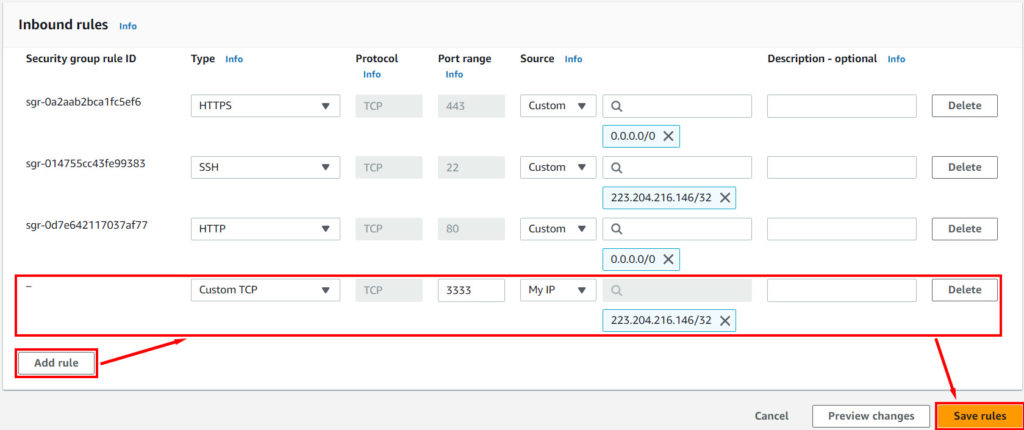
Click Add Rule and create a rule as shown below. Please note that it is safer to allow access from only your IP.
Click Save rules.
You need to make the ‘gophish’ file in the gophish directory executable. To do this, run the command:
sudo chmod +x gophishNow you can run GoPhish on the server:
sudo ./gophish
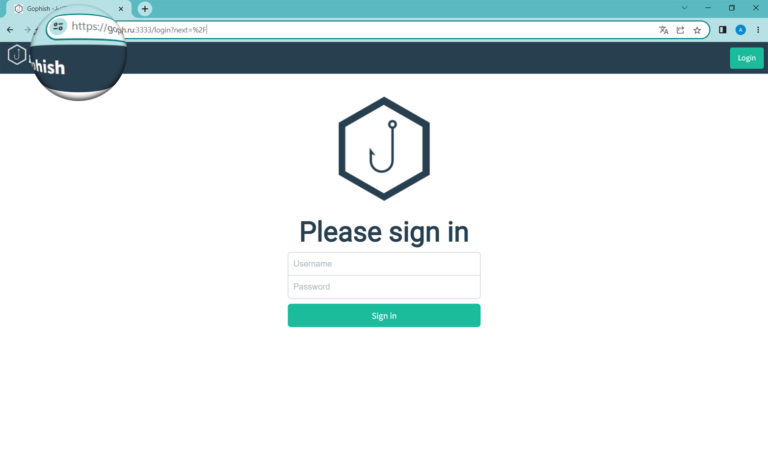
Now that GoPhish is running, open a browser and enter the IP address of your EC2 instance by typing http://<IP address here>:3333 and you should have a login page such as shown below:
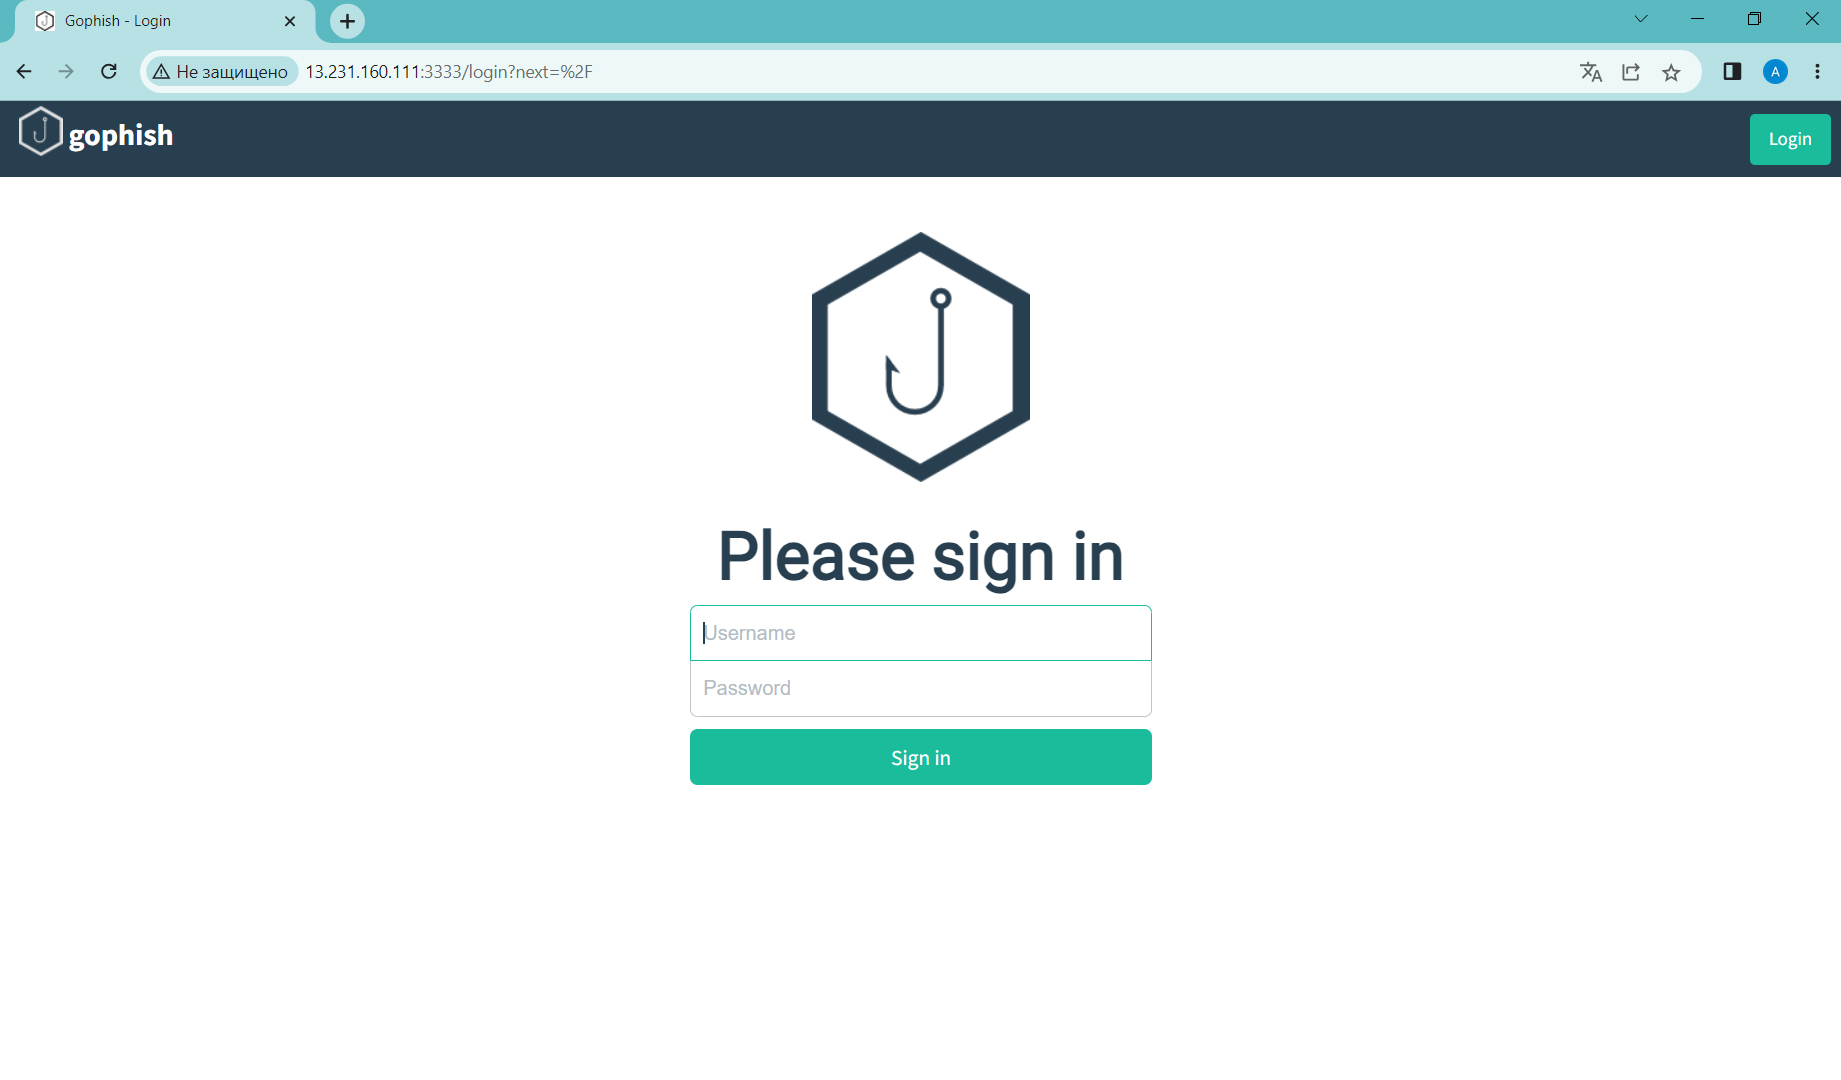
Use Login ‘admin’ and password specified in the terminal:

Don’t forget to change your password the first time you log in.
Now that you have this part set up and logged in, you can set up your own mail server on your GoPhish instance. You can also use Gmail SMTP Server to send.
In my next article, I’ll cover additional steps for setting up HTTPS connections, as well as creating phishing emails and setting up phishing web pages for your users to visit.